IOT Series (3) - Integrating Your Existing Doorbell into HomeKit Without Construction

What We're Going to Try Today
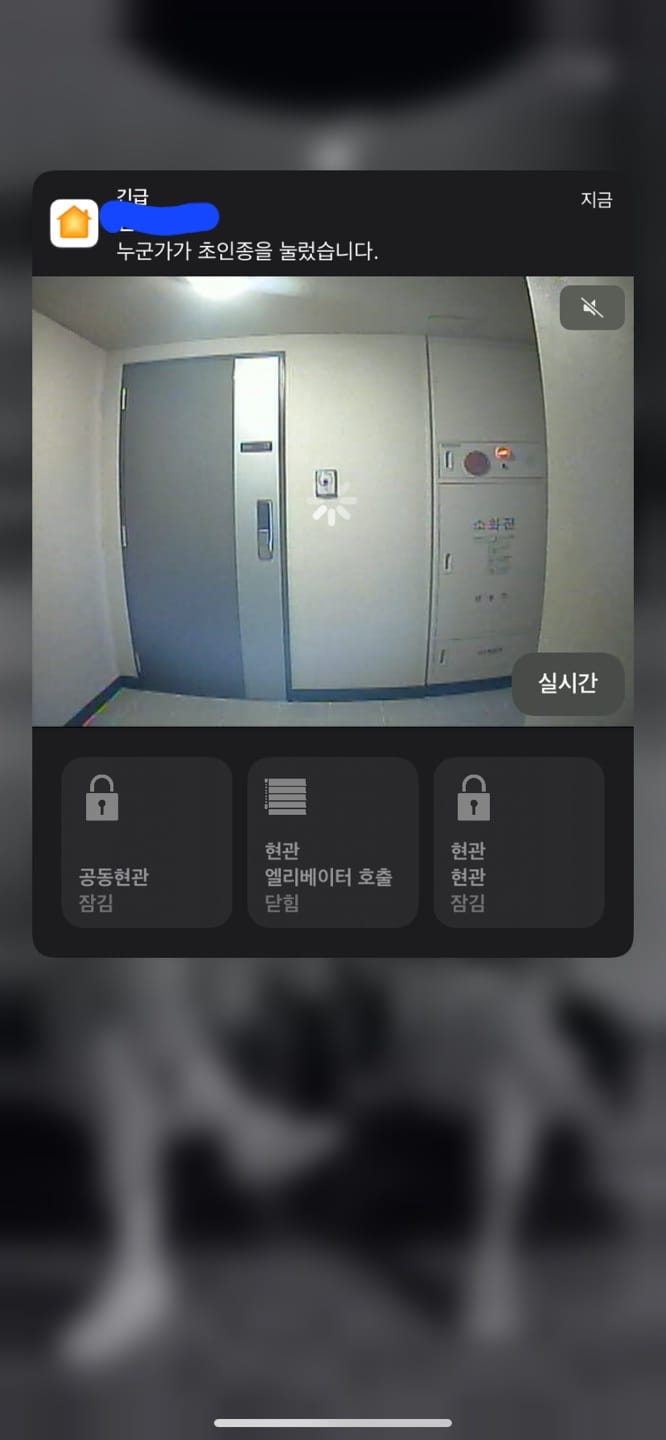
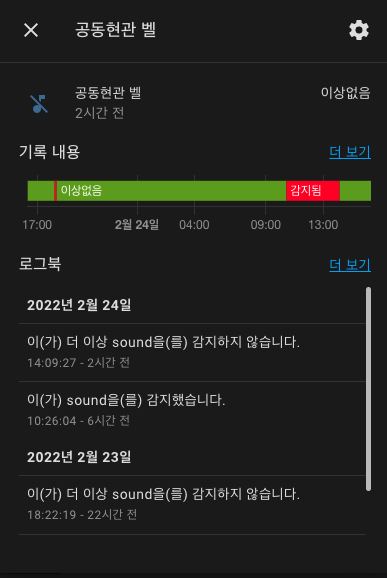
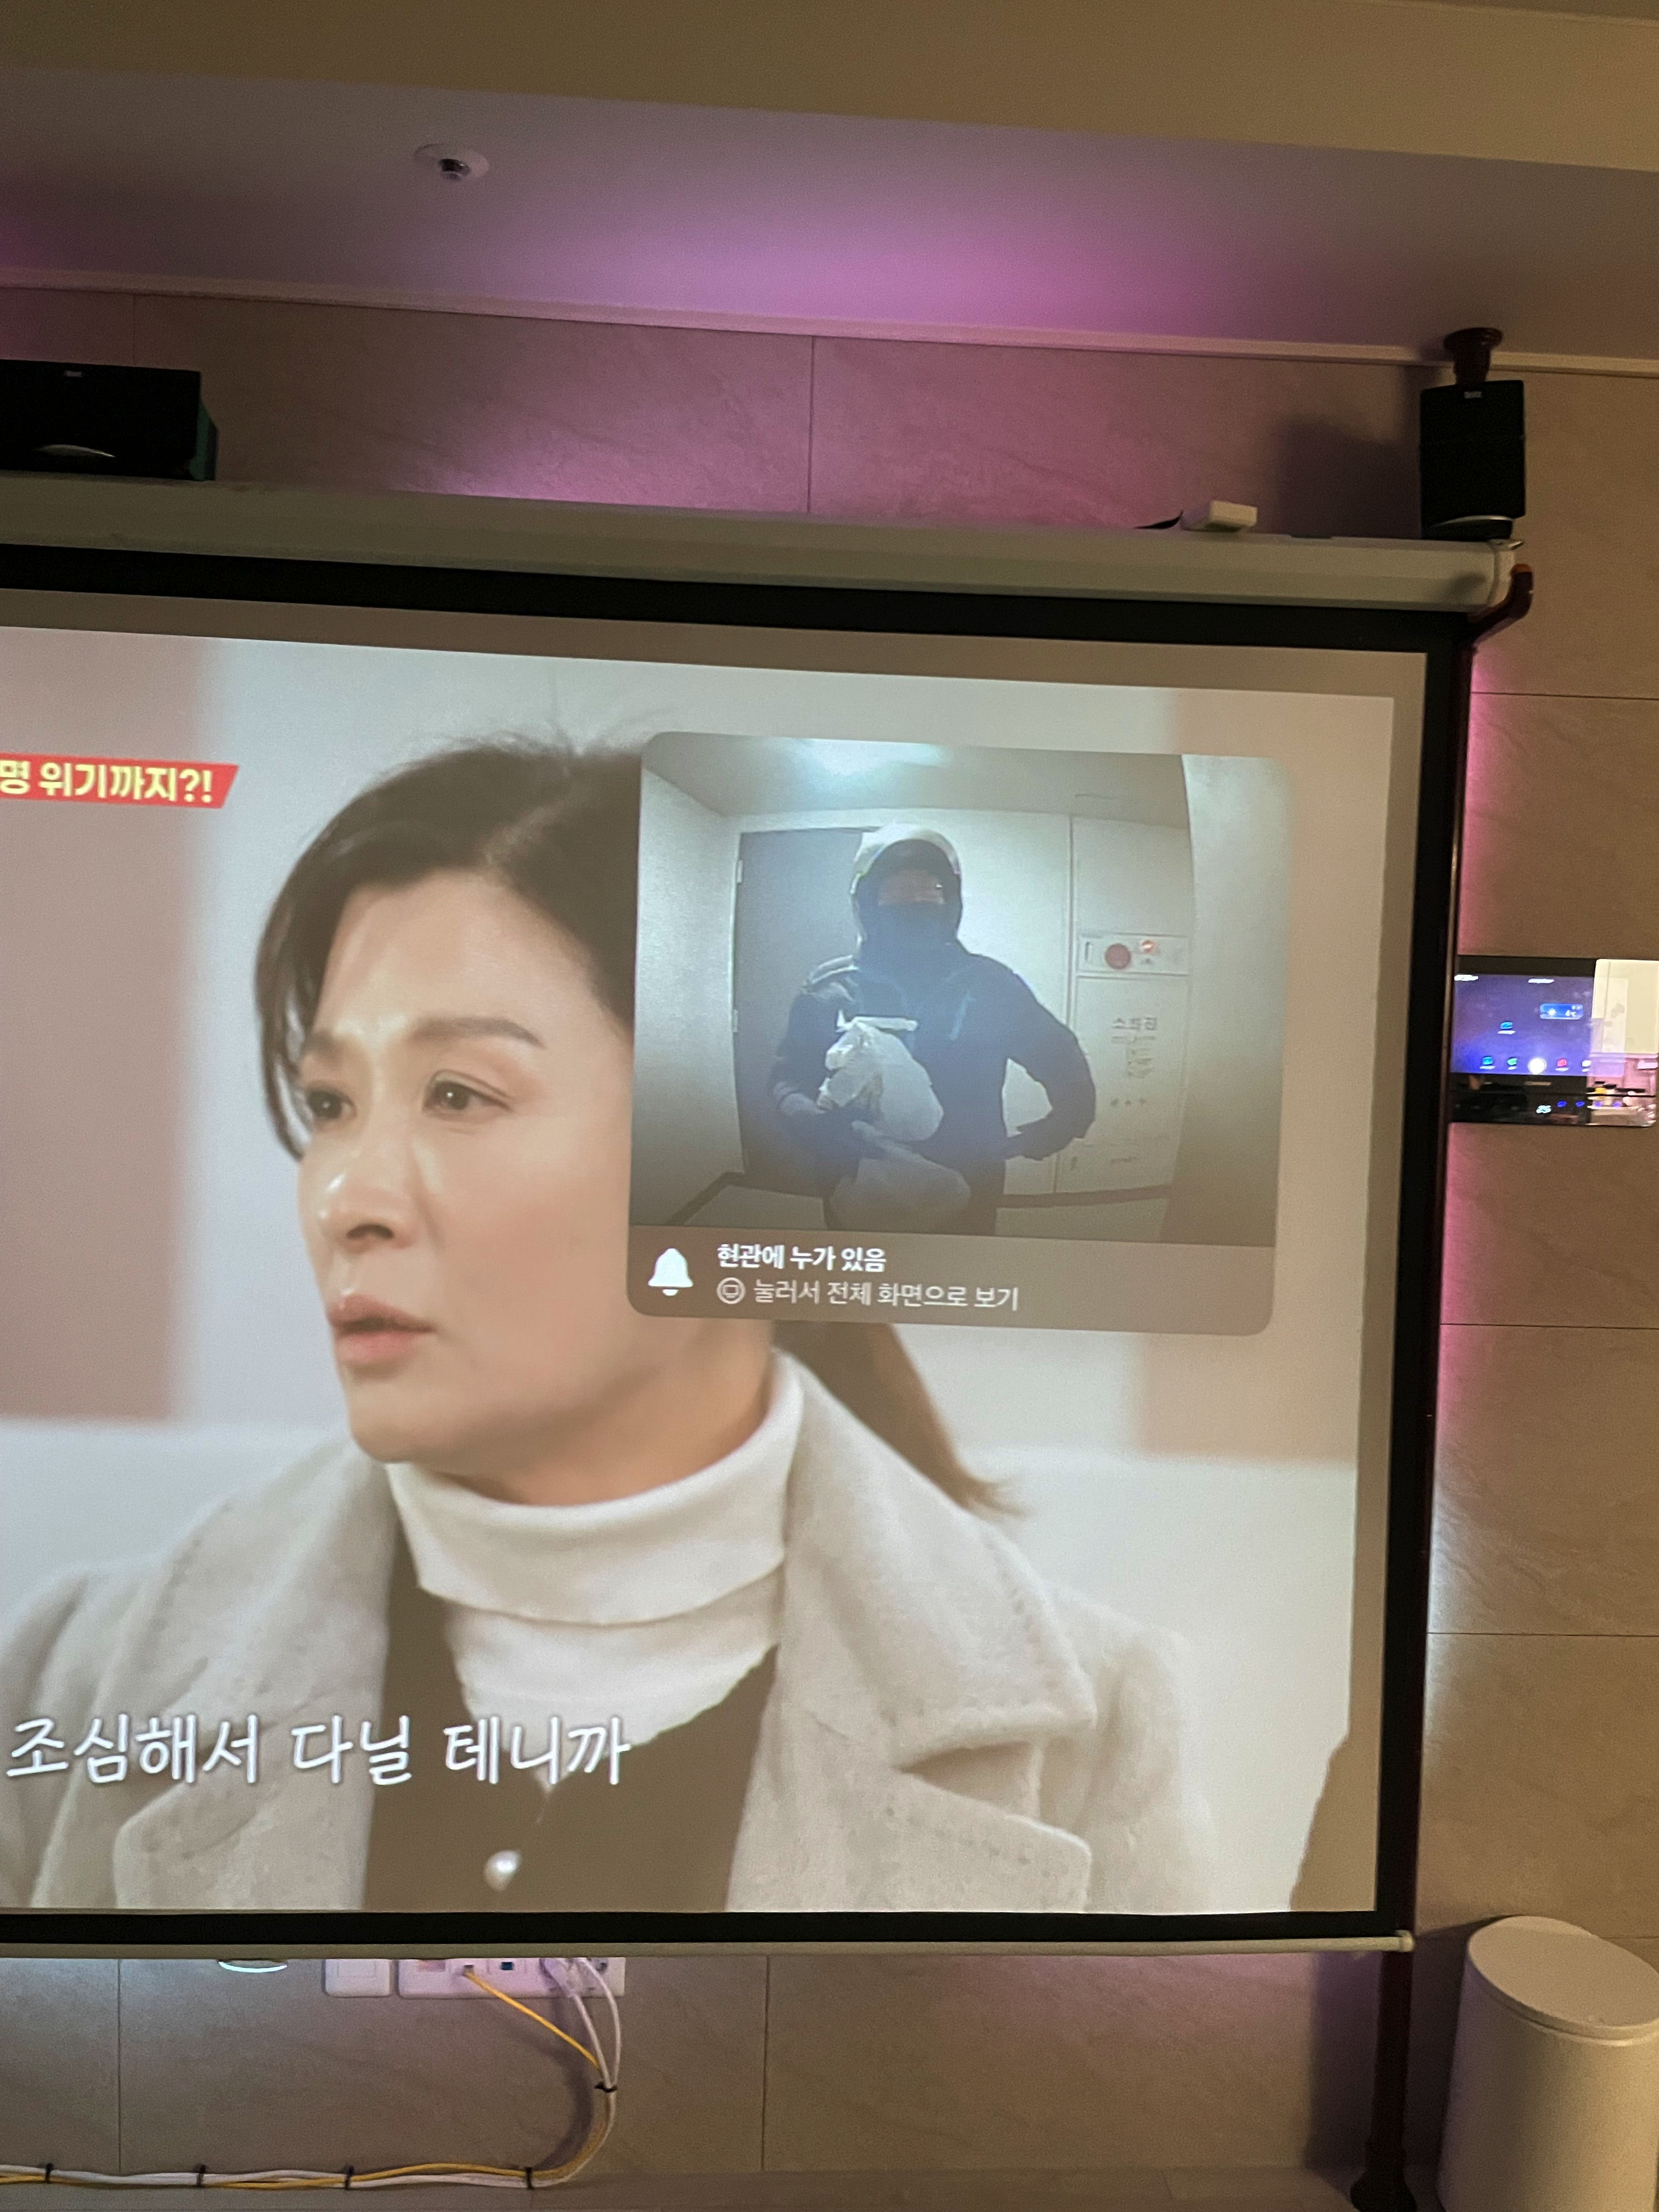
Today, I'm going to write about creating the Homekit doorbell feature, as shown in the screen above.
Method
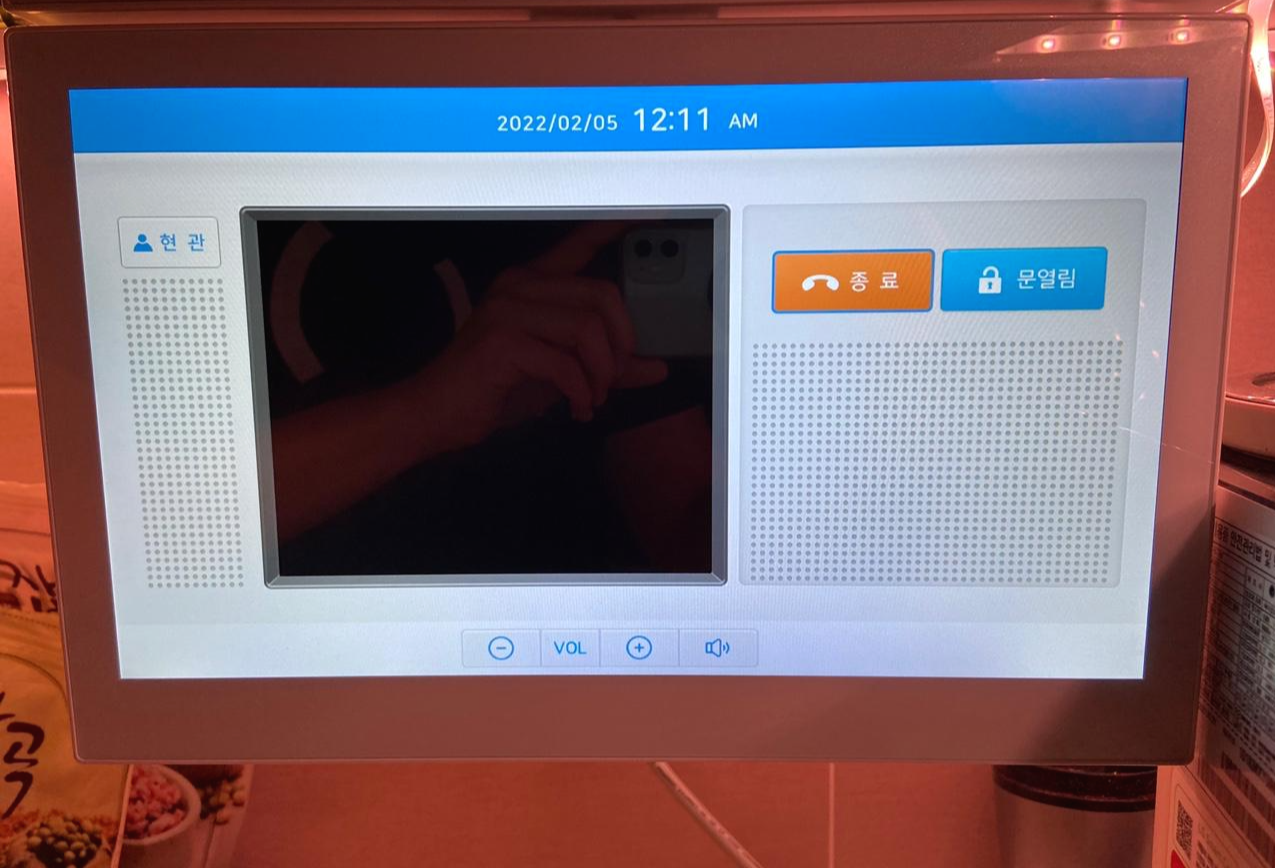
The method uses the kitchen TV system. The kitchen TV has a feature to open the main entrance/front door.
Since they need to deliver products universally, I assumed the system would be standardized, so I looked at the board.
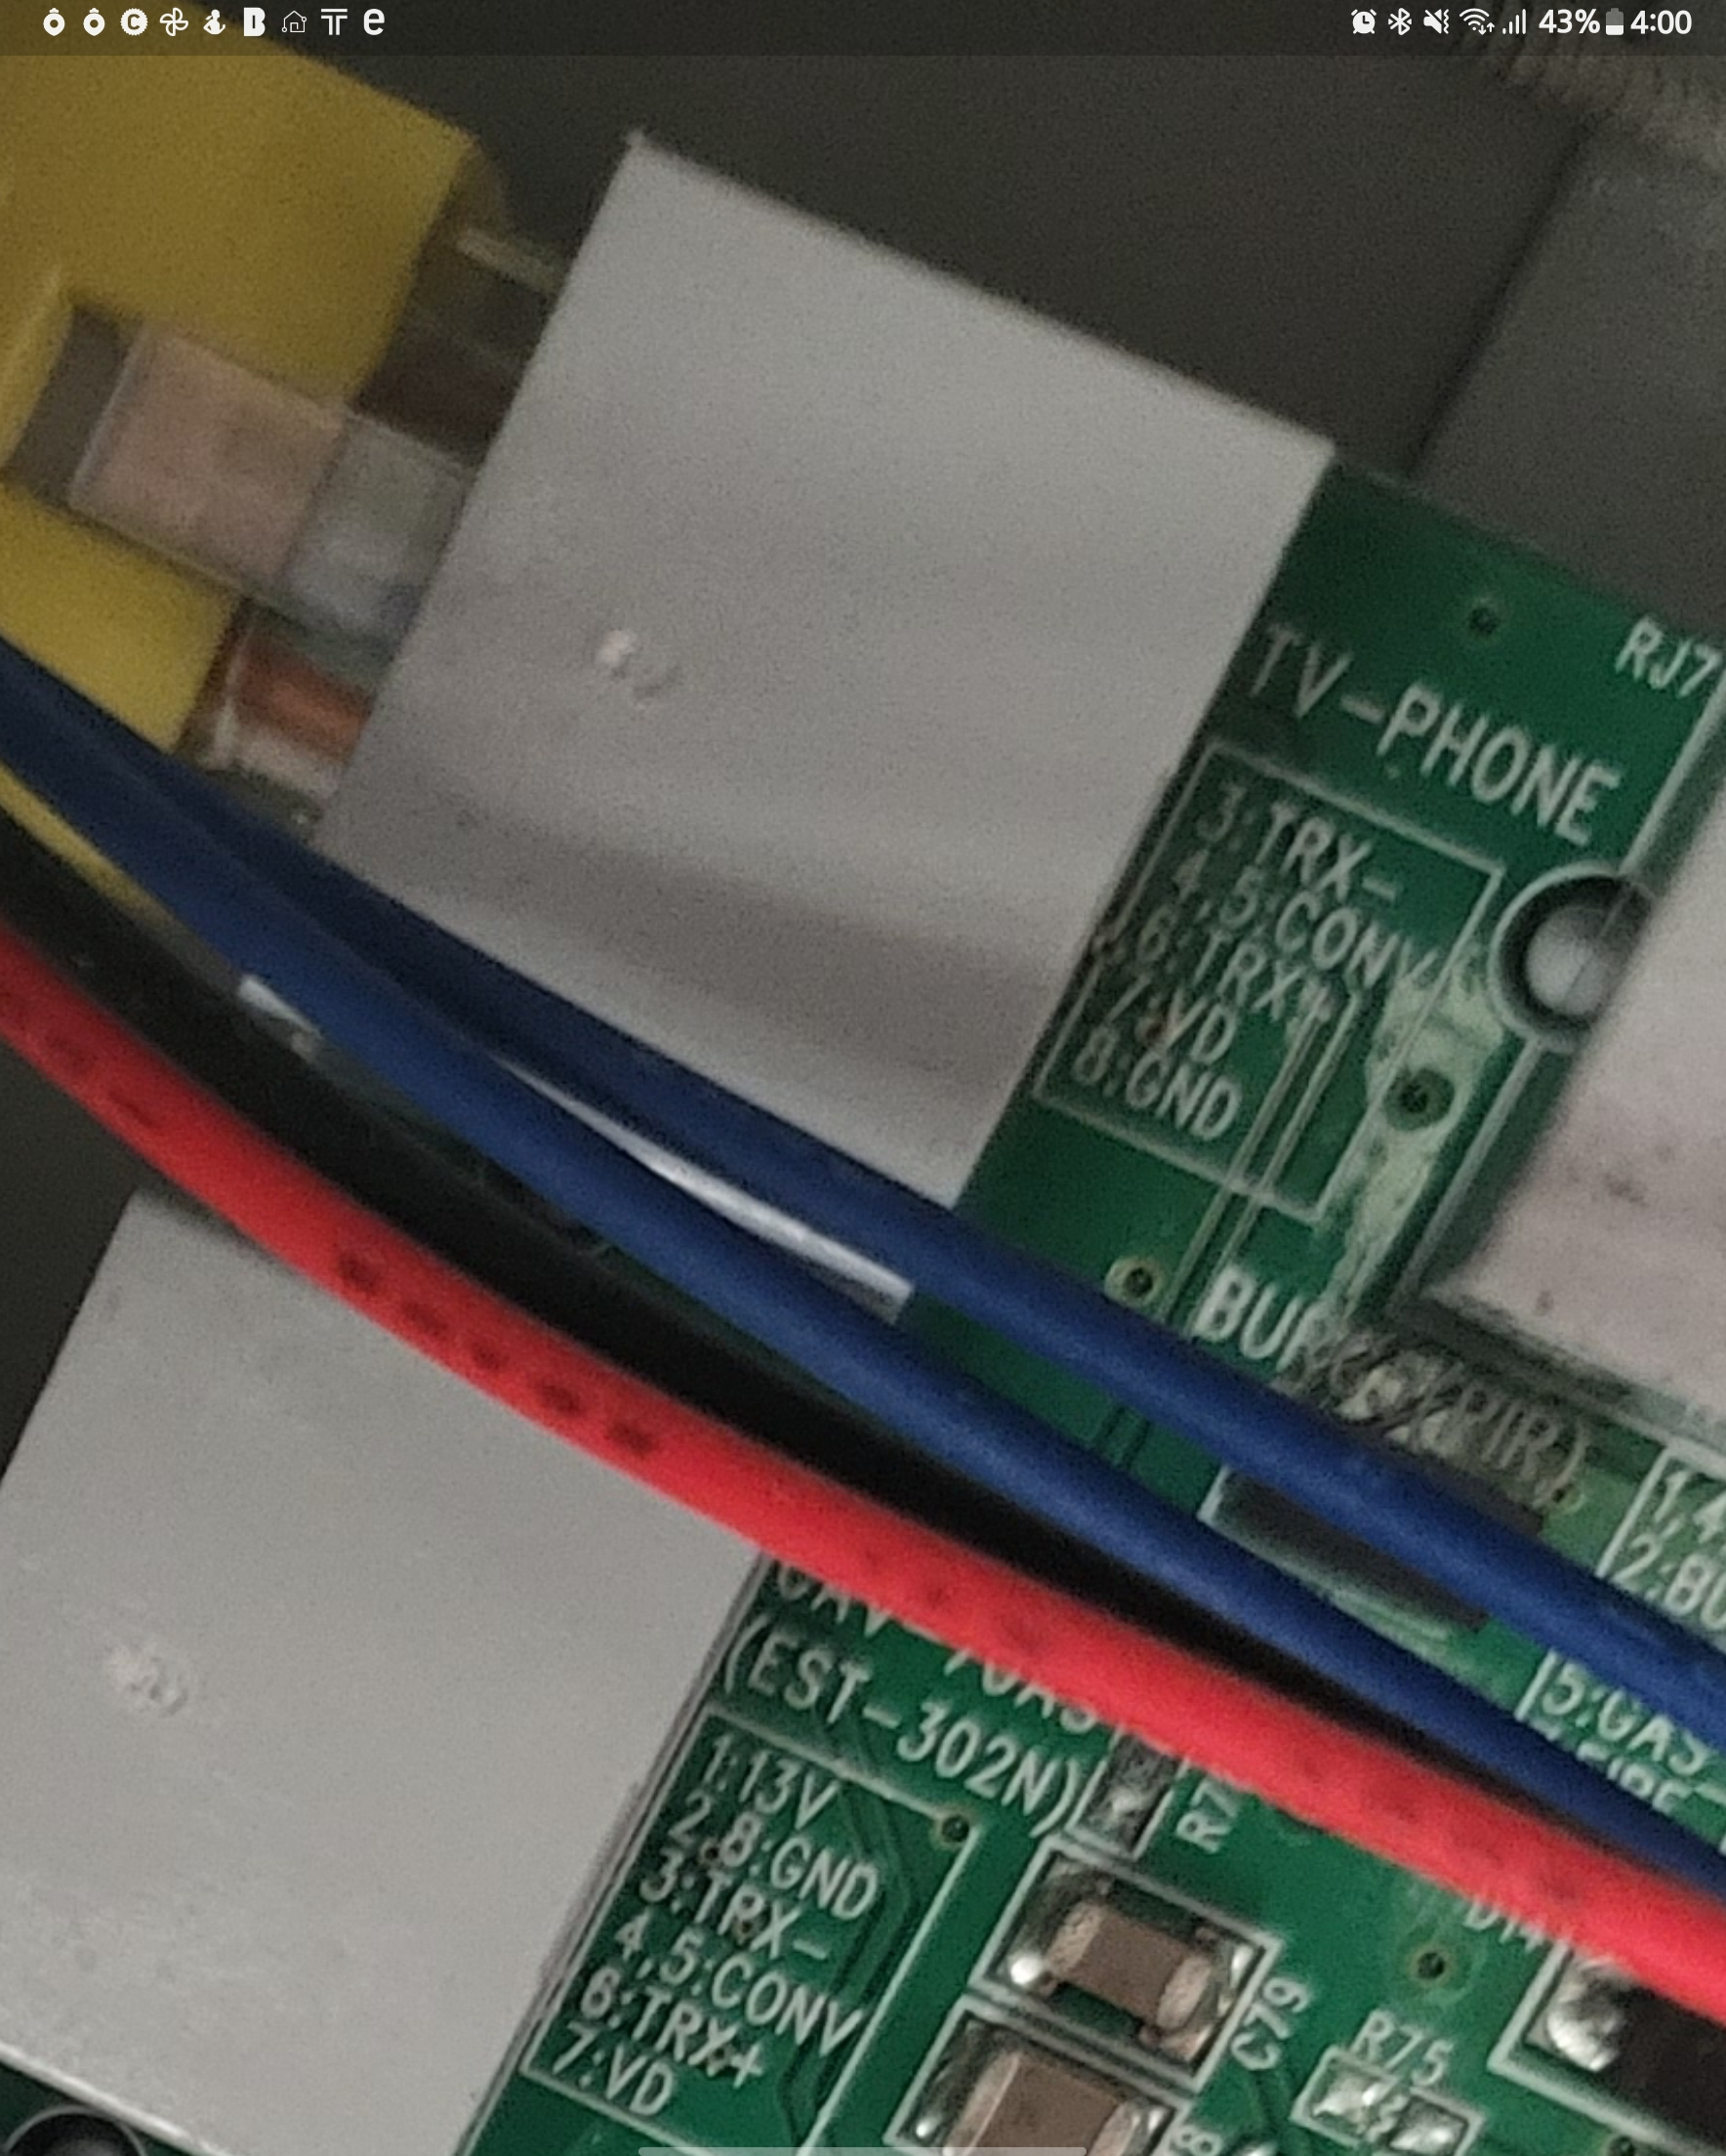
The part labeled TV-PHONE is the signal line going to the kitchen.
Hmm~ Pins 3/6 seem to be the data communication line for RS485 connection.
And while wondering what the VD line was, I found out it was an analog video signal.
Now, let's purchase some equipment to capture the packets.
First, I purchased an RCA cable for the analog video line.
Vention Oxygen-Free 3 RCA to 3 RCA Audio Video AV Cable 1.5m (COUPANG)
Since I have the cable, I naturally need a capture card, so I purchased one as well.
In my case, since I needed to connect it to a Linux device, I purchased an EasyCAP device.
STK USB 2.0 Video / Audio Converter Audio Video Adapter Easycap Capture Card (COUPANG)
Now let's connect the analog video.
I Connected the Analog Video, But There Was No Response.
Now let's connect the analog video. I carefully did the wiring while looking at the wiring diagram, but..

There was no response.. I investigated why the video wasn't coming through and found two problems.
First, the wiring diagram on the board and the actual device wiring are different.
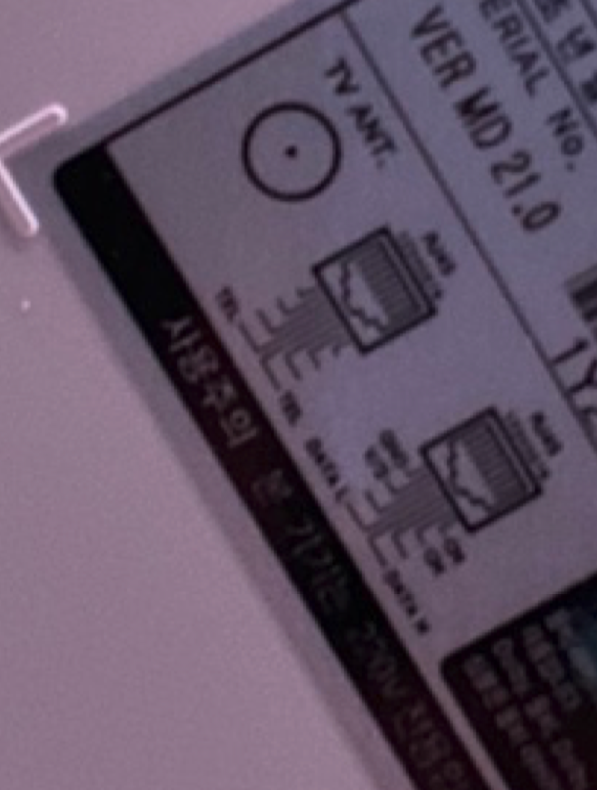
On the board, pin 7 was the video line, but the actual connection used pin 2.
It turned out that the RJ45 line wasn't made according to standard, and the LAN cable was made to match the TV equipment.
Most kitchen TVs have a wiring diagram on the back, so make sure to check it for reference.
Second, don't just connect the VD line - make sure to connect the GND as well.
I don't have a photo, but the video cable needs both a signal line and a GND line.
At first, I thought since there was only one line, it would work with just one, but that wasn't the case.
The wire that seemed to be for protection on the outside was the GND line.
Make sure to connect it to the GND line on the board as well.
Finally, the Video Works.

Finally, the video works. Now let's try streaming it.
In my case, I'm using the EasyCap mentioned above connected to a Raspberry Pi.
I tried several options, and the package below worked the best.
GitHub - mpromonet/v4l2rtspserver: RTSP Server for V4L2 device capture supporting HEVC/H264/JPEG/VP8/VP9 There are many people who have written better installation guides than me, so I'll just leave a link.
[Raspberry Pi] V4L2 RTSP Server Installation
Now Let's Receive Events.
COMMAX has physically separated RS485 lines - one for controlling home lighting and boiler, and another for opening doors.
That line is the TRX -/+ connected to the kitchen TV, and through this, we need to receive events when the front door doorbell or main entrance doorbell rings.
Please refer to my previous post for the method.
IOT Series (2) - Capturing Packets from Existing Equipment For my home's Commax equipment, the packets are as follows.
# 현관 카메라 ON/OFF
CAMERA_ON = ["02", "11", "00", "00", "00", "00", "02", "01", "14", "03", "04", "50", "00", "07", "86", "03"]
CAMERA_CALL_START = ["02", "11", "00", "00", "00", "00", "02", "01", "14", "03", "04", "40", "00", "07", "76", "03"]
CAMERA_OFF = [
    "02", "11", "00", "00", "00", "00", "02", "01", "14", "03", "06", "40", "00", "07", "78", "03"
]

# 현관문 관련 이벤트
MAIN_DOOR_OPEN_EVENT = ['02', '10', '02', '01', '14', '03', '02', '01', '14', '03', '00', '00', '00', '00', '44', '03', '02',
                   '10',
                   '02', '01', '14', '03', '02', '01', '14', '03', '10', '00', '00', '00', '54', '03']
MAIN_DOOR_END_EVENT = ['02', '10', '02', '01', '14', '03', '02', '01', '14', '03', '00', '00', '00', '00', '44', '03']
MAIN_DOOR_OPEN = [
    "02", "11", "00", "00", "00", "00", "02", "01", "14", "03", "05", "00", "00", "07", "37", "03"
]

# 공동현관 이벤트
COMMON_DOOR_START_EVENT = ['02', '10', '02', '01', '14', '03', '02', '01', '14', '03', '00', '00', '00', '00', '44', '03',
                     '02', '10', '02', '01', '14', '03', '02', '01', '14', '03', '04', '00', '00', '00', '48', '03']
COMMON_DOOR_SESSION_START =  ['02', '11', '00', '00', '00', '00', '02', '01', '14', '03', '04', '30', '00', '07', '66', '03']
COMMON_DOOR_END_EVENT = [
    "02", "10", "02", "01", "14", "03",
    "02", "01", "14", "03", "00","00", "00", "00", "44", "03"
]
COMMON_DOOR_SESSION_END = ['02', '11', '00', '00', '00', '00', '02', '01', '14', '03', '06', '30', '00', '07', '68', '03']

# 지하주차장과 지상출입문의 패킷이 다르다.
COMMON_DOOR_SESSION_END2 = [
    '02','12','00','00','00','00','02','01','14','03','41','30','00','07','a4','03',
    '02','15','02','01','14','03','02','01','14','03','03','00','00','00','4c','03',
    '02','10','02','01','14','03',
    '02','01','14','03','00','00','00','00','44','03'
]

COMMON_DOOR_OPEN = ['02', '11', '00', '00', '00', '00', '02', '01', '14', '03', '05', '00', '00', '07', '37', '03']
Based on the captured packets, I developed a custom component to receive data as a sound type binary_sensor.
I also developed a custom component for door opening to work through the Lock Entity.
Configuring HomeAssistant
First, let's connect the camera via RTSP from EASYCap.
camera:
  - platform: generic
    stream_url: RTSP주소
    name: "현관"
Next, let's configure the trigger settings to receive notifications in HomeKit.****
homekit:
- name: Home
port: 21066
safe_mode: true
entity_config:
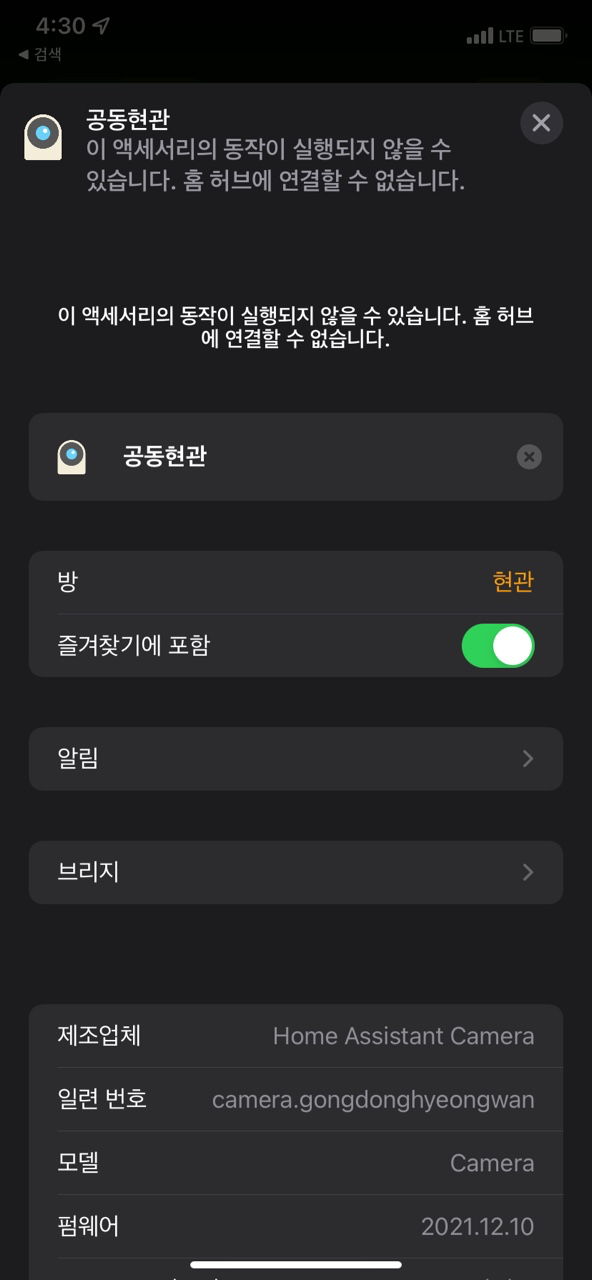
camera.gongdonghyeongwan: // 카메라 이름
linked_doorbell_sensor: binary_sensor.doorbell // 위에서 개발한 현관 도어벨 이벤트를 수신하는 바이너리센서
After doing this, restart HomeAssistant and you're ready!
Receiving HomeKit Notifications
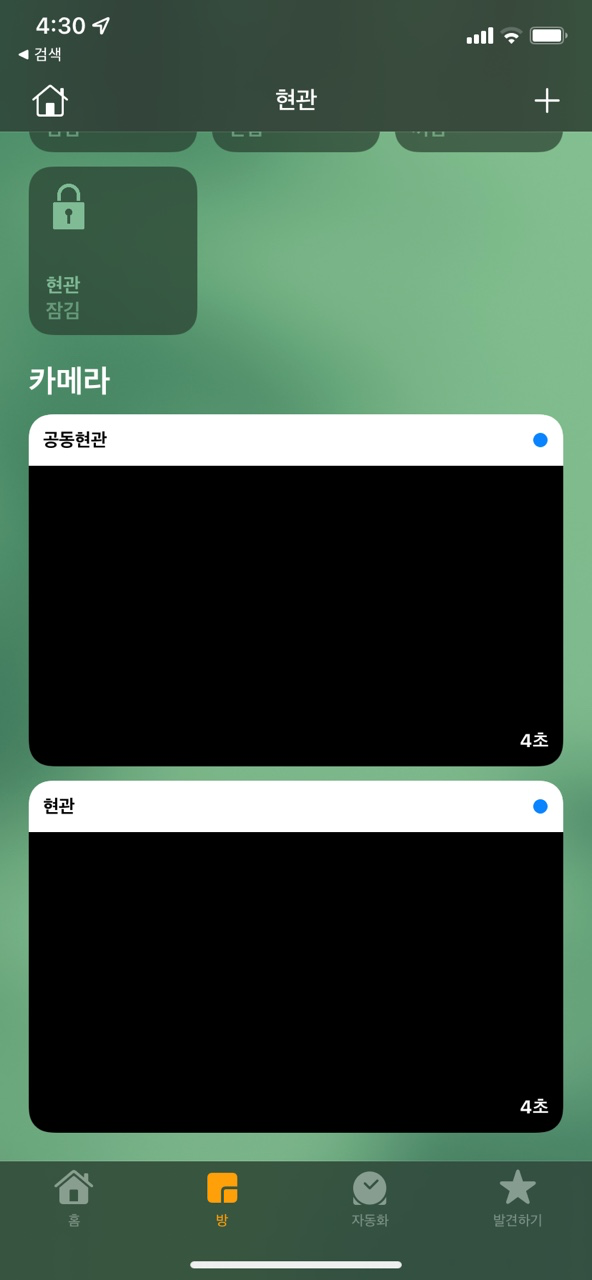
If the settings above are configured correctly, cameras will start appearing in the Home app as shown above.
Go into the camera and navigate to settings, then
Click on Notifications
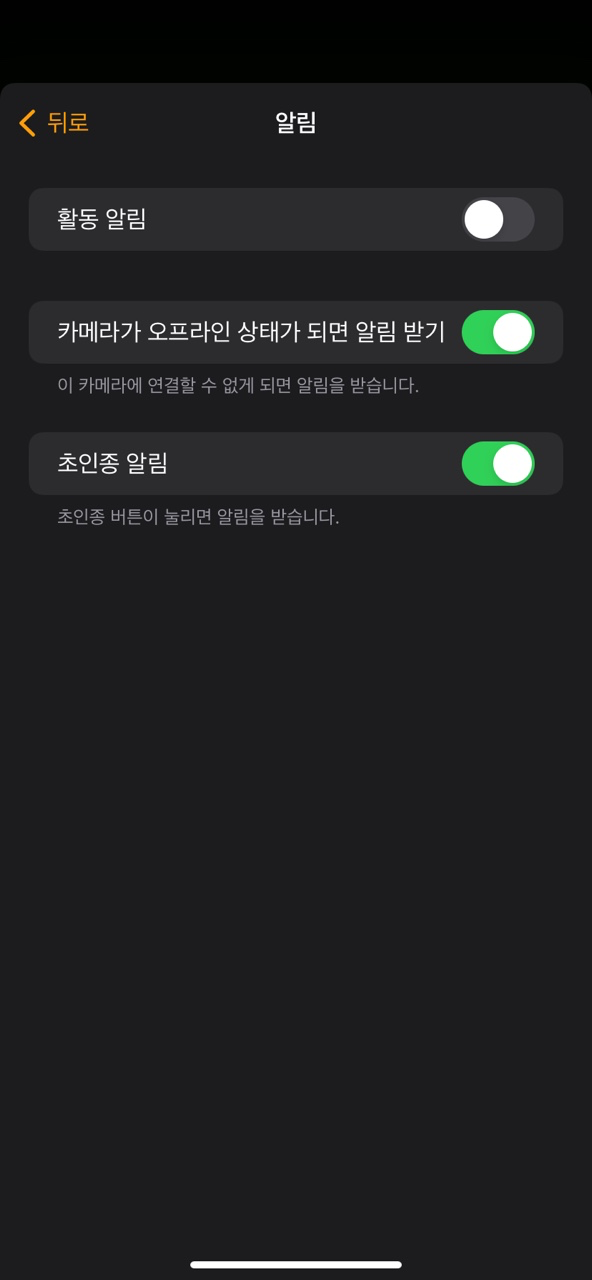
Select doorbell notifications, and now notifications will be integrated with HomeKit.
Expected Questions Q&A
Q. Does it also support the main building entrance? Is there a separate line?
A. No, there isn't a separate line - it comes through the VD line. By default, the front door screen is shown, but when the main building entrance rings, the main building entrance screen appears. I suspect it comes through: Main entrance ↔ Home wall pad (TCP) → Kitchen TV (analog).
Q. Do you need to press a button to open the front door?
A. For Commax equipment, you can open the door with a door-open packet regardless of the call session.
The main building entrance requires a call session.
Q. Can you share the custom component?
A. I don't have plans to share it.
Q. Is it worth using?
A. Yes, it's quite useful.
Conclusion
Using it well.. haha
Within the Apple ecosystem, you can open the front door even while watching TV, and you can let guests enter ahead of you when they arrive from outside.
Apple's Home ecosystem is truly the best.
I would love to replace the doorbell with an FHD-grade camera supported by Logitech, but
since I'm still a renter and not a homeowner... I satisfied myself with a setup that requires no construction and can be easily removed when moving.
When watching the projector, the wall pad is always an eyesore - I should cover that wall pad up depending on the situation.
Home IOT is always fun.